HOW TO SHOW HIDDEN FILES AND FOLDERS IN WINDOWS 11
Learn how to show hidden files and folders in Windows 11 with our easy guide. Follow simple steps to access all your files effortlessly. #Windows11 #TechTips
INTRODUCTION:
Are you having trouble finding hidden files on your system? Hidden files are typically user-generated or important files that are hidden by default to prevent unintentional modification or deletion. Nevertheless, you may occasionally need access to these hidden documents for research or customizing needs. We'll guide you through the process of making hidden files visible in Windows 11 in this easy-to-follow tutorial, so you can easily navigate your system.
Understanding Hidden files
Files or folders on your computer that aren't usually visible to the user are known as hidden files. They are hidden to prevent accidental modification or deletion, which could harm your system or jeopardize its stability. However, there are situations in which you might need to access these hidden files, such as when troubleshooting or adjusting your system's settings.
How to Show Hidden Files in Windows 11
Follow these simple guide to make hidden files visible in Windows 11:
Method 1: Making Use of File Explorer Options:
Step 1: Open File Explorer
To Open File Explorer, either click on the File Explorer icon on the taskbar or use the ”Windows key + E” on your keyboard.
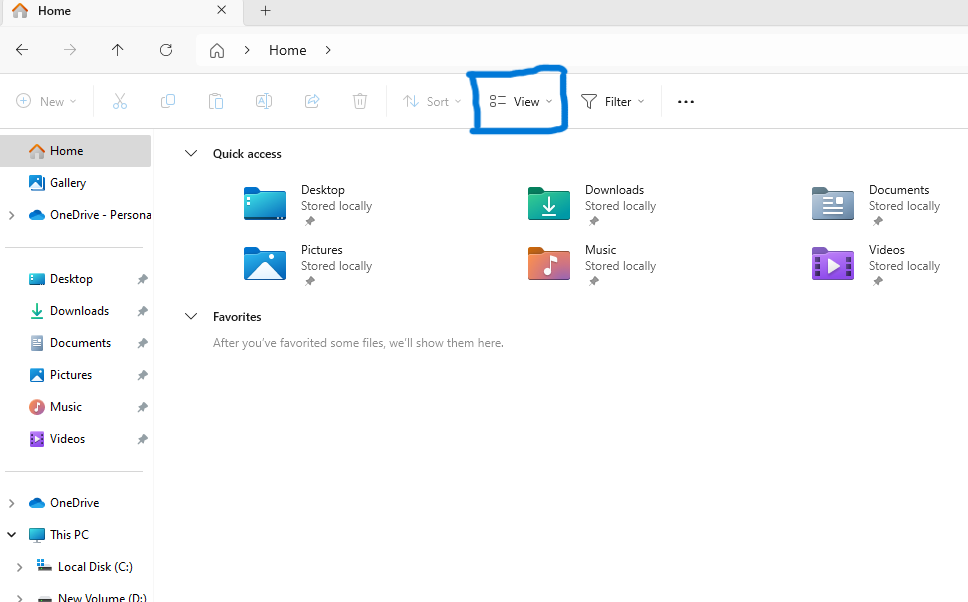
Step 2: Navigate to View Tab
Navigate to the "View" tab located at the top of the File Explorer window.
Step 3: Choose Your Options
On the far right side of the ribbon, press the "Options" button. The "Folder Options" window will open as a result.
Step 4: Proceed to Access Folder Options
If it's not selected already, navigate to the "View" tab in the "Folder Options" window.
Step 5: Show hidden Files and Folders
Locate the "Hidden files and folders" option beneath the "Advanced settings" section.
Step 6: Check the box
Select “Show hidden files, folders, and drives" and then click "Apply" and "OK."
This will enable Windows 11 to display hidden files and folders on your system.
Step 7: Apply changes
To make the changes you've made permanent, click the "Apply" button located at the bottom of the window.
Step 8: Verify Modifications
Click "OK" to confirm the modifications and close the "Folder Options" window.
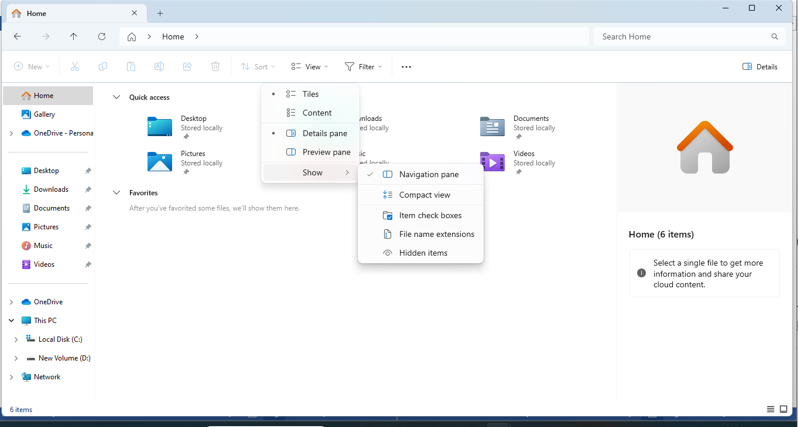
Method 2: Making Use of the Folder View Menu
• Open any folder: You can use the one you have for documents, downloads, or any folder you like.
• Click on the View Tab: As shown in the first method, locate the “View” tab at the top of the File Explorer window.
• Show Hidden Files: Look and find the "Hidden items" checkbox under the "View" tab. To make the hidden files and folders visible, check the option.
• View hidden files: Now, go back to File Explorer and you should see hidden files and folders next to your regular files, as well as hidden files. To distinguish them from regular files, they may appear slightly blurry or italicized.
NOTE:
Keep in mind that it is important to exercise caution when editing hidden files, even when viewing them is beneficial. Changing system files can lead to unexpected behavior or even instability in your system.
CONCLUSION:
Uncovering hidden files might be a straightforward procedure that is crucial for troubleshooting or adjusting your system configuration. Therefore, bear in mind these simple methods to get the files you want the next time you're searching for hidden files in Windows 11.
Thanks for reading.
If you like the article, consider sharing and subscribing. ;)