How to Set Up a Full-Stack JavaScript Environment on Windows 11
Learn how to set up a full-stack JavaScript environment on Windows 11 with Node.js, MongoDB, Express, and React in this easy step-by-step guide!
INTRODUCTION
Windows 11 is an excellent platform for creating full-stack JavaScript applications because of its improved performance and intuitive UI. Setting up a full-stack JavaScript environment on Windows 11 is easier than you might think. This article will walk you through the steps to install everything you need to build web applications, regardless of whether you're new to Windows or making the switch. Let's begin!
Why Opt for JavaScript Full Stack?
Because of JavaScript's flexibility, you can design your applications' client-side (frontend) and server-side (backend) components. This method enables you to utilize a single language across your whole stack, speeds up development, and encourages code reuse.
Prerequisites
• A machine running Windows 11 with administrator privileges is required.
• A dependable internet connection.
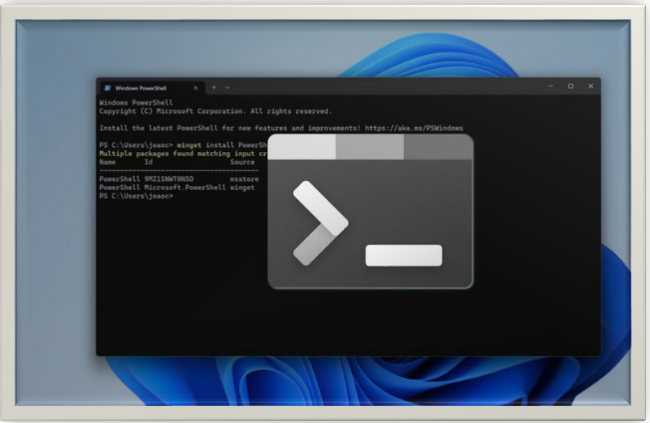
Step 1: Set up npm and Node.js
Node.js is a runtime environment that enables you to execute JavaScript code outside of a web browser. Managing your project dependencies requires the use of npm (Node Package Manager), which comes with Node.js.
How to Install npm and Node.js:
Download Node.js
-
Download Node.js from the official Node.js website.
-
Because it is more stable, download the most recent LTS (Long Term Support) version.
-
Choose the option for Windows Installer (.msi).
Launch the installer:
-
Launch the .msi file that was downloaded.
-
Accept the default settings and proceed with the installation wizard. Ensure that the "Add to PATH" option is selected.
-
Make sure to restart your computer after the installation is finished.
Verify the installation:
-
Open PowerShell or Command Prompt.
-
Press Enter after entering the command
node -v
This will display the installed version of Node.js.
- Next, enter the following command and press enter
npm -v
The version of npm that is installed on your system will be shown.
Congratulations if version numbers are returned by both commands! Node.js and npm have been successfully installed by you.
Step 2: Installing a code editor (VS Code)
For JavaScript development, Visual Studio Code (VS Code) is the preferred editor.
How to install Visual Studio Code:
-
Go to the official website for Visual Studio Code.
-
Download the Windows version.
-
Run the installation and adhere to the prompts displayed on the screen.
-
Installing these useful extensions will improve your setup once Visual Studio Code is open:
- ESLint (for JavaScript linting)
- Prettier (for code formatting)
- Live Server (for local execution of your front-end projects)
Step 3: Set up version control and install Git
Git is a robust version control system that lets you monitor and manage code changes.
How to install Git:
-
Visit the official website for Git.
-
Get the most recent version for Windows and install it.
-
Type the following into the Command Prompt:
git --version
Git has been successfully installed if a version number appears.
- Enter your name and email address to set up Git:
git config --global user.name "Your Name"
git config --global user.email "your-email@example.com"
Step 4: Installing MongoDB for Backend Development
A well-known NoSQL database that is frequently used in full-stack JavaScript applications is MongoDB.
How to install MongoDB
-
Visit the MongoDB official website.
-
Install the MongoDB Community Edition after downloading it.
-
Open the Command Prompt and run the following to start MongoDB:
mongod
- Install the MongoDB Compass, a graphical user interface (GUI) tool, from the MongoDB website to manage your databases visually.
Step 5: Establishing a Project Directory
-
To store your project files, create a new folder on your computer. Let's say you call it "my-fullstack-app."
-
Launch Visual Studio Code, choose "File" > "Open Folder," and then pick the folder for your project.
Step 6: Starting a Project in Node.js
-
Go to View > Terminal in Visual Studio Code to access the integrated terminal.
-
In the terminal, change the directory to your project folder.
-
Run the following command
npm init -y
This will create a package.json file to manage the scripts and dependencies for your project.
Step 7: Frontend Development Setup
You'll most likely select a framework or library like React, Angular, or Vue.js for frontend development.
React :
- Run the following commmand
npx create-react-app-client
This will create a brand-new React application in the "client" subdirectory.
- Enter the directory called "client":
cd client
To launch the development server, run
npm start
Vue.js:
- To install the Vue CLI, use:
npm install -g @vue/cli
- Create a new Vue project:
vue create client
To get started, navigate to the client directory and run
npm run serve
angular
- To install the Angular CLI, use
npm install -g @angular/cli
- Create a fresh Angular project for a new customer:
ng new client
- Navigate to the client directory and run
ng serve
Step 7: Development of the Backend
Express.js is a well-liked option for backend programming.
Install Express.js
- In the root directory of your project, run
npm install express
-
Create a Server File: In the project's root directory, create a new file called server.js.
-
Add simple Express code to this document.
<!-- end list -->
JavaScript
const express = require('express');
const app = express();
const port = 3001;


app.get('/api', (req, res) => {
res.json({ message: 'Hello from the backend!' });
});


app.listen(port, () => {
console.log(`Server listening on port ${port}`);
});
- Turn on the server:In the terminal run;
node server.js
Step 8: Connect the Express Backend and React Frontend
-
Use fetch or a tool like Axios in your front-end application (like React) to send API queries to your back-end server.
-
For example, you can obtain data from /api in a React component:
<!-- end list -->
JavaScript
// Example in a React component
fetch('/api')
.then(response => response.json())
.then(data => console.log(data));
Step 8: Launch Your Complete-Stack App
When your program is ready to run, use the following to deploy it:
-
Frontend: GitHub Pages, Netlify, or Vercel.
-
Backend: AWS, Heroku, or DigitalOcean.
-
Database: MongoDB Atlas, MongoDB's cloud variant.
Conclusion
You may create amazing applications on your Windows 11 computer by following these steps to set up a fully functional full-stack JavaScript development environment. Make sure that the framework and libraries you choose meet the particular requirements of your project.